AWS Marketplace Setup
Subscribe to ConnectHealth on AWS Marketplace and deploy it to your AWS account using CloudFormation.
TL;DR / Key Takeaways
- •Requires an AWS account with admin access and permission to create IAM roles and ECS resources.
- •Subscribe on AWS Marketplace, then deploy via a single CloudFormation template into your VPC.
- •Stack deployment takes approximately 20-25 minutes — fully automated, no manual infrastructure setup.
- •Once complete, access the ConnectHealth portal via the URL in the CloudFormation Outputs tab.
Prerequisites
- • AWS Account with admin access
- • Permission to create IAM roles and ECS resources
- • Valid payment method on your AWS account
Find ConnectHealth on AWS Marketplace
Navigate to the AWS Marketplace and search for ConnectHealth, or use the direct link below.
Open ConnectHealth on AWS Marketplace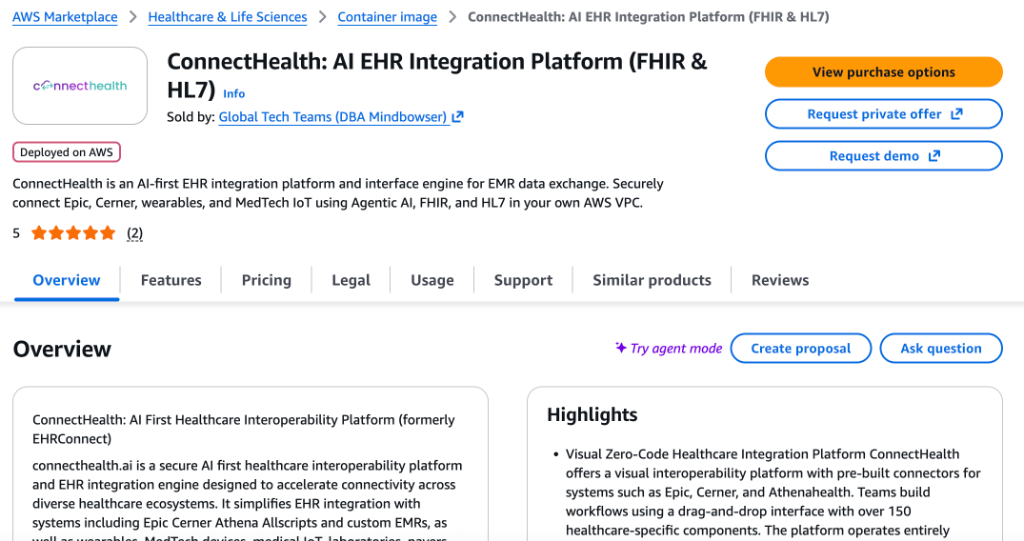
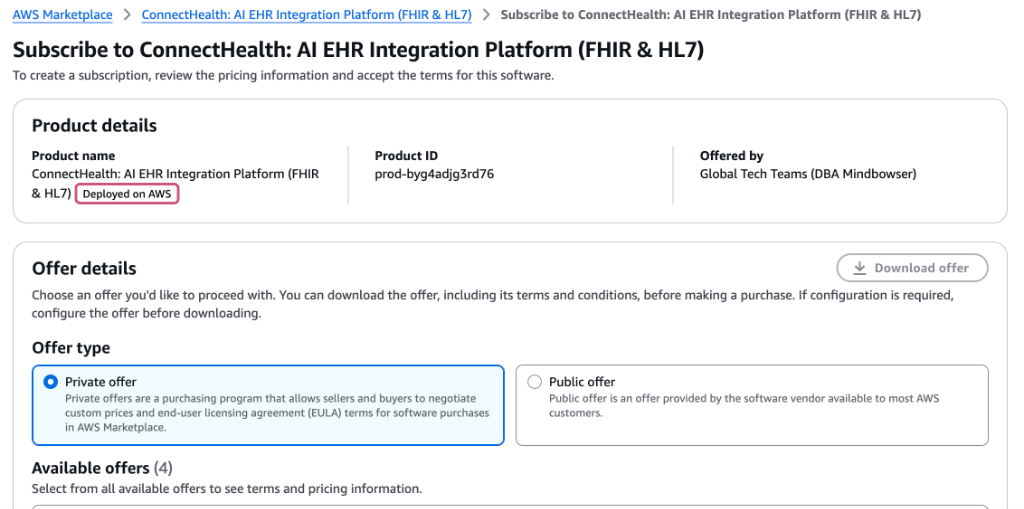
Subscribe to ConnectHealth
Click the orange "View purchase options" button on the listing page.
You will see either a Private Offer (pre-negotiated) or Public Offer depending on your account status.
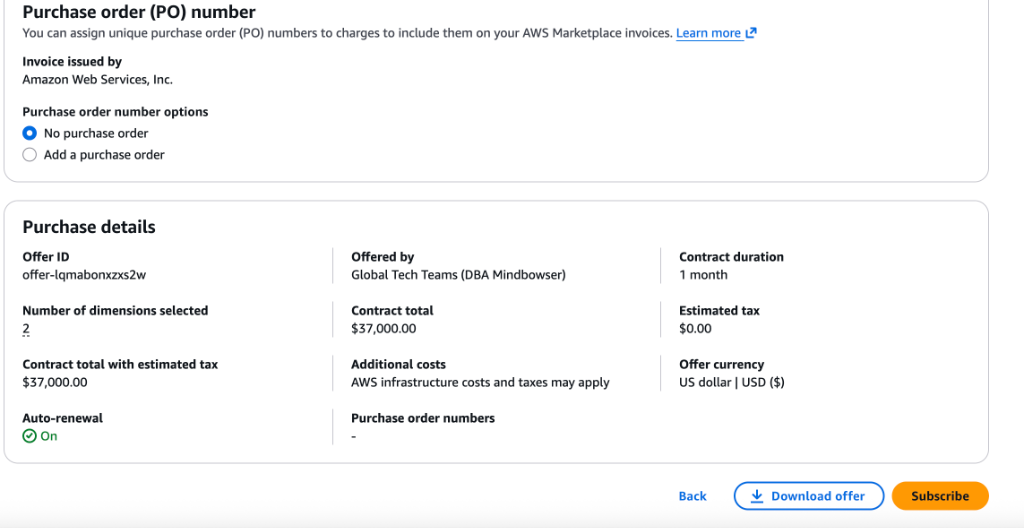
Click "Accept Offer" / "Subscribe" to proceed.
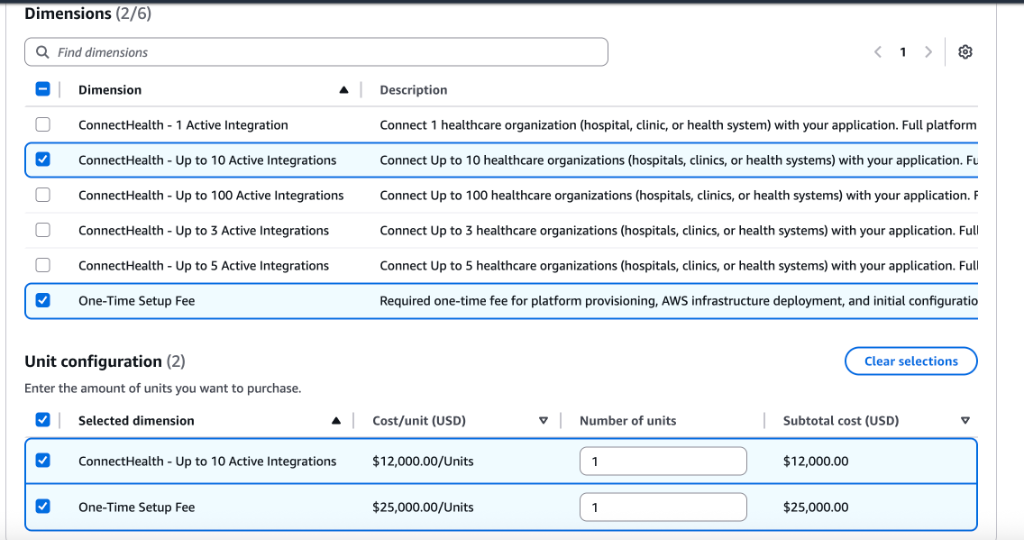
- Review the pricing and configuration
- Select One-Time Setup Fee
- Select your desired Active Integration tier
- Click "Accept Offer" / "Subscribe"
- Click "Continue to Configuration" once active
Processing & Launch
Wait for the "We're processing your request" message to complete (approx. 1 minute).
Once approved, you will see a green success banner.
Click "Launch your software" to proceed.

CloudFormation Setup
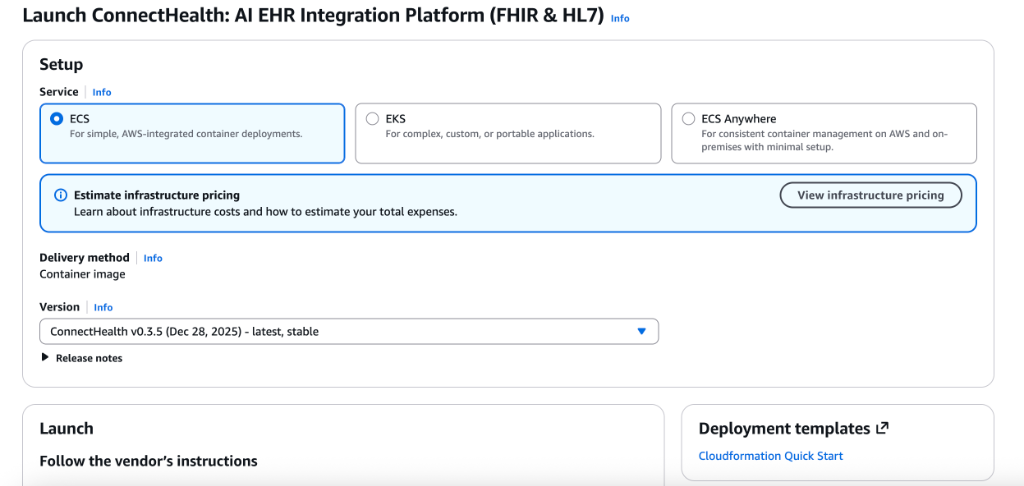
You will be redirected to the Launch Configuration page.
- Locate the Deployment templates card (bottom right)
- Look for "CloudFormation Quick Start"
- Click to download the template OR copy the link address
Create CloudFormation Stack
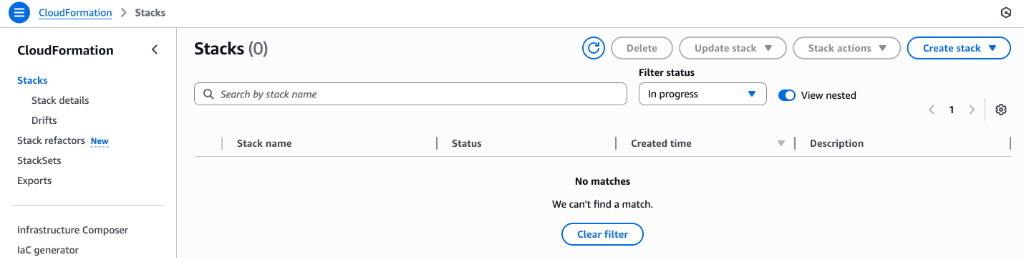
Navigate back to your AWS Management Console and search for CloudFormation.
- Go to Stacks in the sidebar
- Click "Create stack" → "With new resources (standard)"
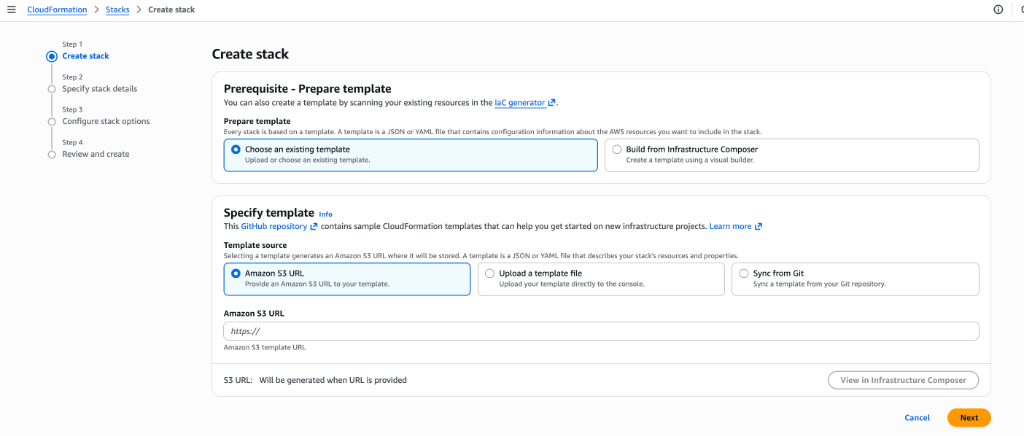
- Under Prepare template, select "Choose an existing template"
- Select "Upload a template file" (if you downloaded it) or "Amazon S3 URL" (if you copied the link)
Specify Stack Details
Configure the stack parameters below. These defaults are optimized for a QuickStart sandbox environment.
* You may adjust CPU, Memory, and Networking settings to match your specific production requirements and organizational policies.
Stack Name
Application Configuration
Resource Configuration
Note: CPU and Memory can be increased based on load. Defaults are suitable for sandbox.
Network Configuration
SSL Certificate (Optional)
To use a custom domain (e.g., connect.yourhealth.com), you must first request a public certificate in AWS Certificate Manager (ACM).
Review your settings and click Next through the remaining screens (Configure stack options, Review). Finally, click Submit.
Configure Stack Options
On the Configure stack options screen, you can typically keep the default settings. Review the options below for validation.
Tags Optional
Useful for organizing and tracking billing for your resources.
Permissions Optional
You can generally leave the IAM role field blank. CloudFormation will create the necessary roles based on the template capabilities.
Stack Failure Options
Defines what happens if the stack fails to create.
Capabilities Acknowledgement
At the bottom of the review page, you must check the box acknowledging IAM resource creation.
Click Next to review, then scroll to the bottom and click Submit / Create stack.
Wait for Deployment
The CloudFormation stack will take approximately 20-25 minutes to complete.
How to know it's ready
When the stack status shows CREATE_COMPLETE, your deployment is ready.
Get Your Portal URL
Find your ConnectHealth portal URL in the CloudFormation Outputs tab.
- Go to AWS CloudFormation in your console
- Click on your ConnectHealth stack
- Navigate to the Outputs tab
- Copy the value for
ServiceUrlHttps
https://connect-alb-EXAMPLE-DNS.us-east-1.elb.amazonaws.comOpen this URL in your browser. You should see the ConnectHealth login page.
Using a Custom Domain?
If you provided an SSL Certificate ARN in Step 6, you can now map your domain (e.g., connect.yourhealth.com) to this load balancer. Simply create a CNAME record in your DNS provider pointing to the ServiceUrlHttps value above.
https://connect-alb-EXAMPLE-DNS.us-east-1.elb.amazonaws.comFirst Login
Log in with the default administrator credentials found in the Outputs tab.
Default Credentials
DefaultUsernameadministratorDefaultPassword<Value from Outputs>Security Requirement
Upon your first login, the system will require you to change this default password to a new secure password of your choice.
Congratulations!
You've successfully deployed ConnectHealth to your AWS account. Next, you'll create your first EHR connection and build a workflow.